How to Setup Yoast WordPress SEO Plugin (2017 Edition)
When it comes to WordPress SEO, then Yoast is the best SEO plugin for WordPress. Yoast SEO was previously known as WordPress SEO by Yoast. But installing Yoast SEO plugin is not the end. You have to properly setup Yoast WordPress SEO Plugin. Even a small mistake can drop your traffic massively and prevent indexing your pages to Google Webmaster Tools. So after installing Yoast Plugin, you should absolutely clear about the Yoast SEO Setting you are applying. In this article, we will share How to install Yoast SEO Plugin, its features, and Yoast SEO Settings.
Yoast SEO Features:
Yoast offers both Free and Paid version of WordPress SEO plugins. Let’s check out the features:
Free Version Yoast SEO Features List:
- 1 focus keyword and content analysis
- Google Preview
- Post title and Meta description
- Robots meta configuration
- Readability check
- Breadcrumbs and Canonicals
- XML Sitemaps
- Duplicate content checker
- RSS enhancements
Paid Version Yoast SEO Features List:
- Multiple focus keyword
- Redirect manager
- Social previews
- Internal linking
- Insights
- Premium support
Price: $69
SEO Data Transporter (Import & Export SEO Settings from Other Plugins)
If you are already using another SEO plugin like All in One SEO, HeadSpace2, wpSEO etc, then you can export their SEO settings and apply to Yoast.
If you just installed Yoast SEO plugin, then you may not see all options. To get all options, you need to enable “Advanced setting pages” from Yoast Features. Go SEO> General> Features, enable “Advanced settings pages” and click on save changes.
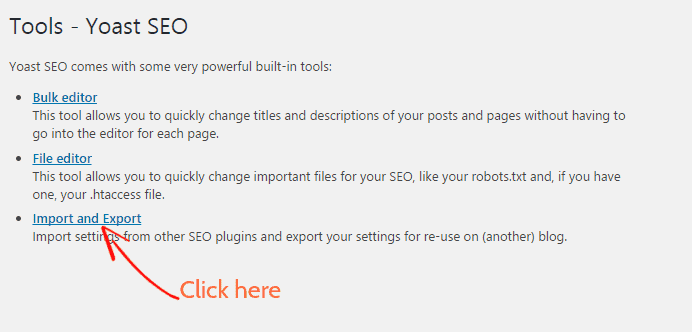
After that, go to SEO> Tools> Import and Export. From here, you can import settings from other SEO plugins and export your settings to use it on another blog.
How to Install Yoast SEO Plugin
To install Yoast SEO plugin, go to Dashboard> Plugins> Add New. Search for Yoast SEO and install it. Then you have to activate it.
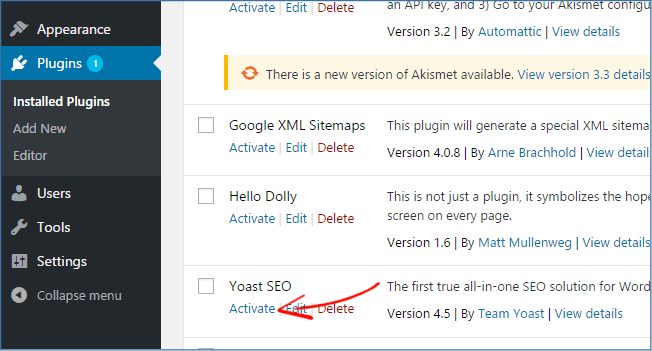
*If you have Google XML Sitemaps enabled, then disable it or it might cause issues when used in conjunction with Yoast SEO and slow down your site.
How to Setup Yoast SEO Plugin
In this guide, we will show how to Setup Yoast SEO Plugin that we use on our website.
Table of Content – Yoast SEO Settings
- General
- Features
- Your Info
- Webmaster Tools
- Security Settings
- Titles & Metas
- Social
- XML Sitemaps
- Advanced Settings
- Tools
- Search Console
Dashboard:
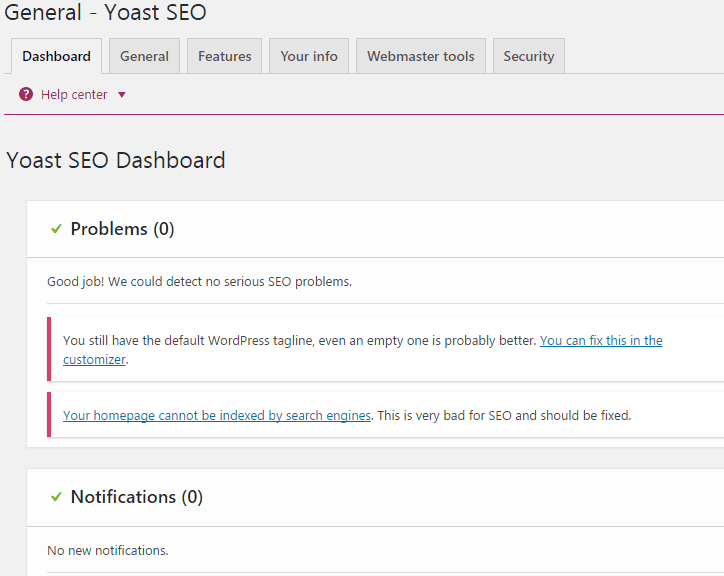
First, go to your WordPress Dashboard> SEO> Dashboard. In dashboard section, you will be notified about Yost SEO problems & notifications. There is no further setting to be configured.
1. General Settings
Now go to General tab and you will be asked to Open the Configuration Wizard. We recommend you to ignore this option because it will configure the default Yoast SEO Settings step by step.

2. Features
In features tab, you can either enable or disable Readability Analysis. It adds content analysis tab in metabox and analyzes the content of your page that helps you to write better content.
Enable Keyword Analysis. It will add keyword tab and give you all keyword related suggestion that you want to focus on a particular Keyword and rank for it.
Turn off OnPage.org integration and Admin bar menu as well.
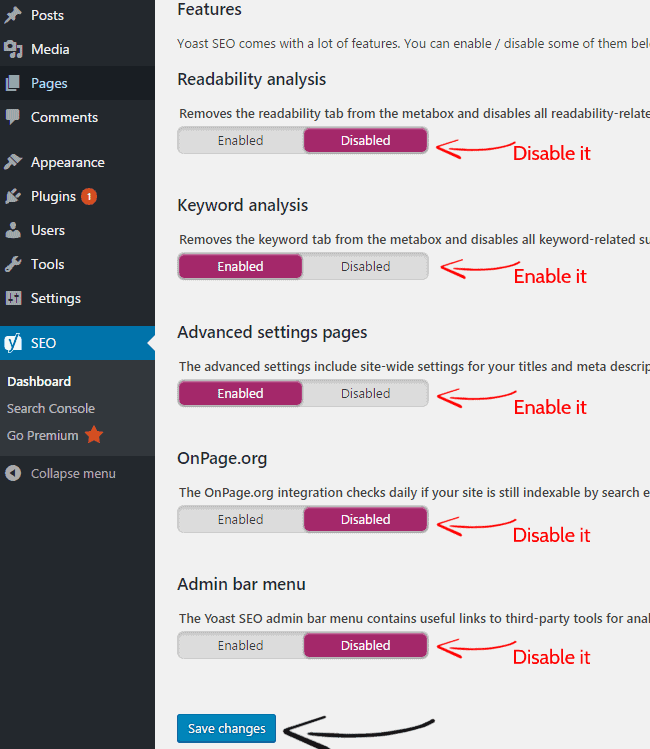
Now click on save changes to store the settings.
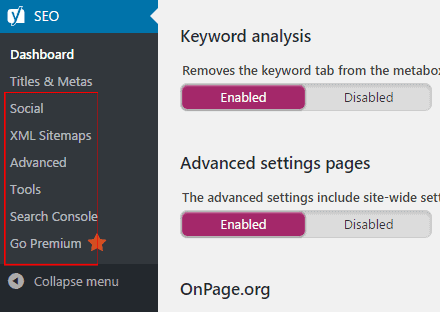
After enabling Advanced page options, you will see those extra options:
3. Your Info
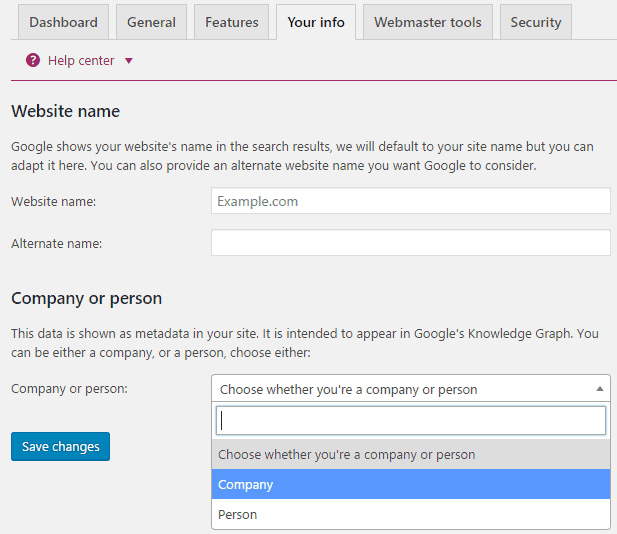
In info tab, write your website name, also write an alternative name if you have any. Next, if you choose you’re a person, then you to provide your name only and if you choose your company, you have to write company name and logo.
4. Webmaster Tools Verification
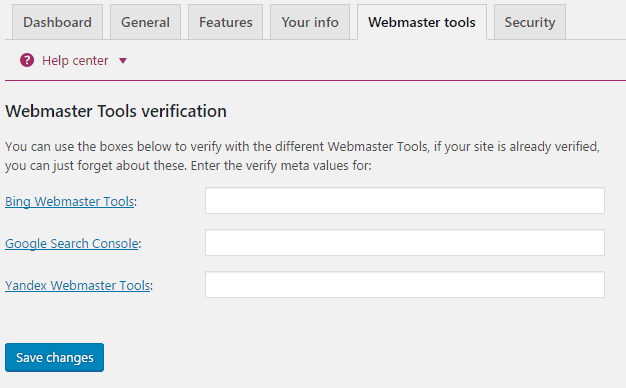
One of the most important things of Yoast Settings is verifying your site to Webmaster Tools such as Google, Bing, Yahoo etc. It allows you to index your pages, check indexing status and optimize visibility of their websites. If your site already verified, then you don’t need to do any process here. You can enter the verify meta values here.
5. Security Settings
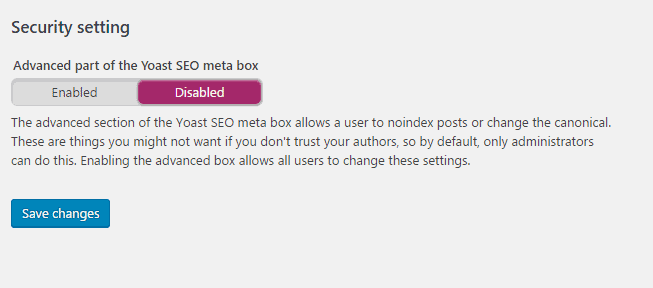
If you don’t trust your authors, you can disable it. It removes the keyword tab from the metabox and disables all SEO-related suggestions. But we recommend you to disable it.
6. Titles & Metas
1. General
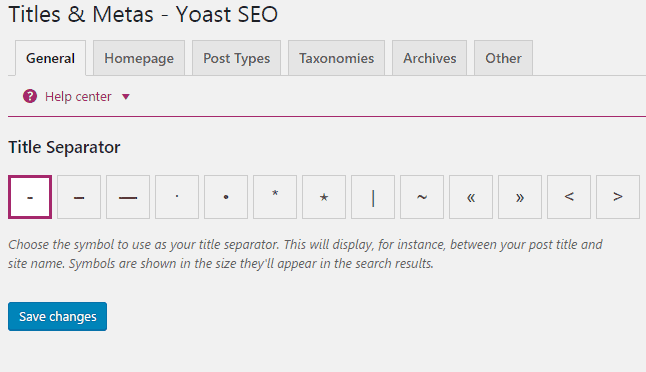
In Titles & Metas tab, choose the symbol to use as your title separator. This will be displayed between your post title and site name. Those symbols are also highlighted in the size they’ll appear in the search results.
2. Homepage
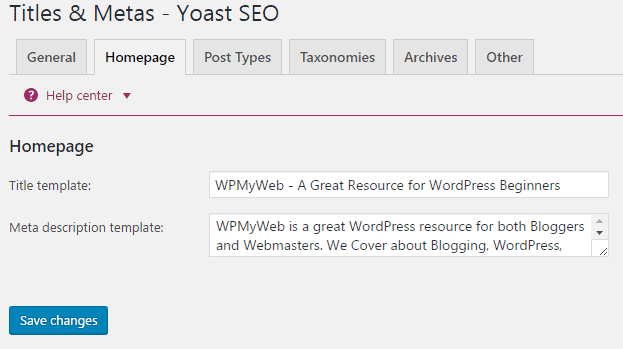
Now click on “Homepage” tab of Titles & Metas section. By default, Yoast SEO uses this variables “%%sitename%% %%page%% %%sep%% %%sitedesc%%”. That means it will highlight your site name, page name, The separator defined in your theme’s wp_title() tag and your site description.

But you need to provide your title and site description that you want to show on Google search. Check the picture below for an instance.
3. Post types
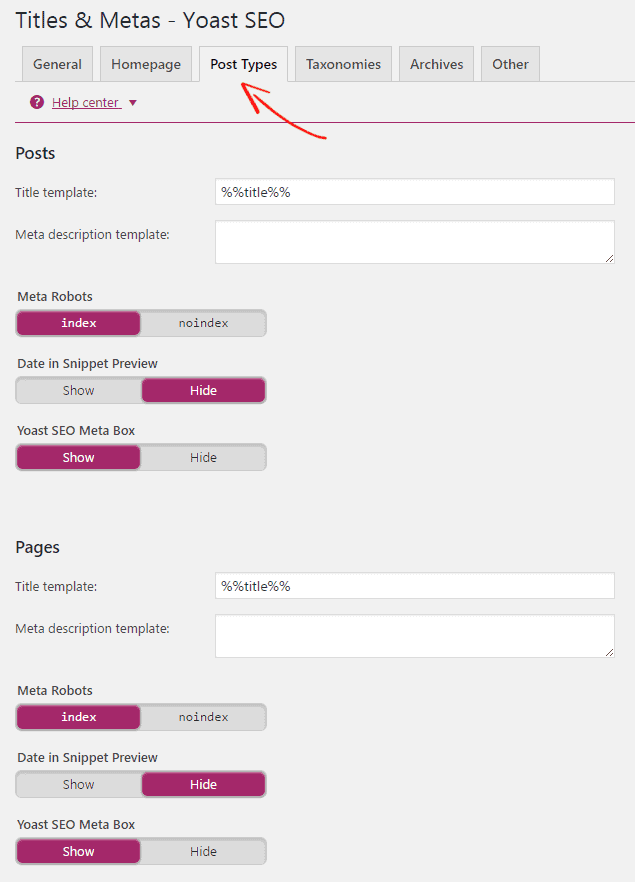
From “Post Types” tab, you can configure the SEO for all of your posts. By default, you will have Posts, Pages, and Media. If you are using custom types of WordPress, then you can see more options below.
If you want to show date on posts in Search Engines, then check “Date in Snippet Preview”. It can increase Click through Rates(CTR) if the content is new.
4. Taxonomies
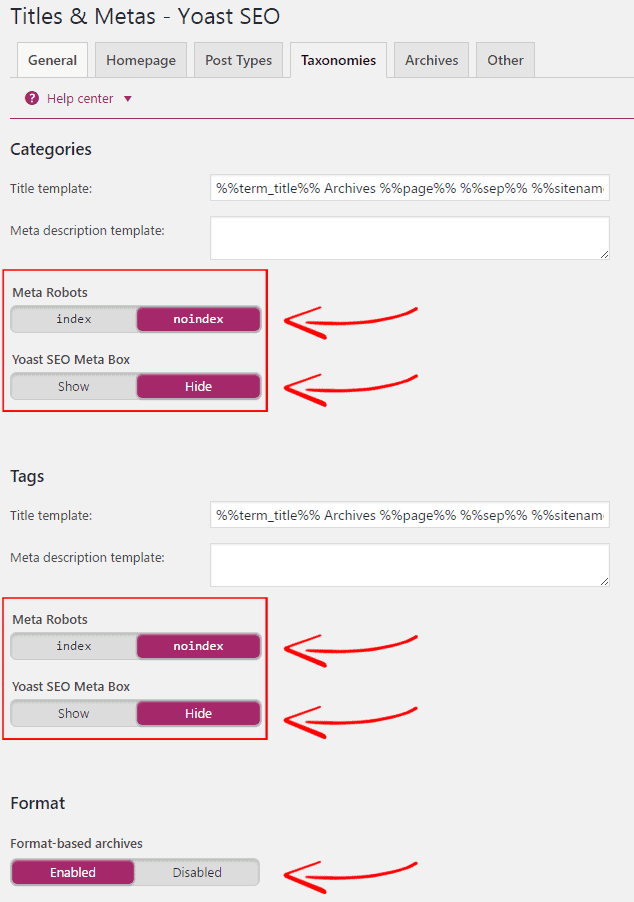
Taxonomies are one of the most important parts to Setup Yoast SEO. If you choose to index your category pages, then Search Results will show your category pages. If you have a blog website, then I don’t recommend you to index your categories or tags.
However, if you have E-commerce or Online shopping site, then you can allow your Categories to get indexed. For this, you need to design them carefully, add keywords in the meta description and you need a lot of content under a category.
Tags are not helpful pages for visitors and can cause duplicate content. So you can no-index them.
5. Author Archives Settings
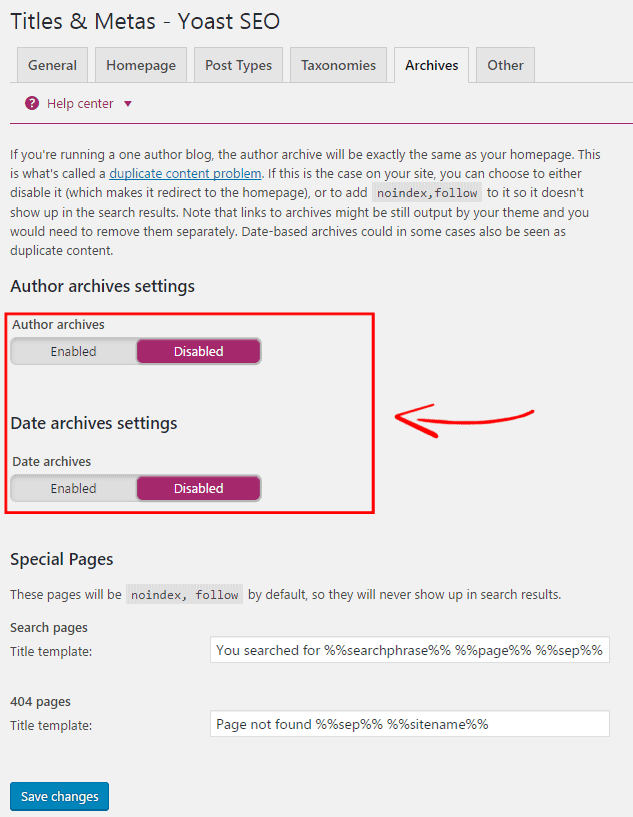
In author archives settings, I set them no-index to prevent duplicate content.
6. Sitewide Meta Settings
If you want to prevent “Pagination” or /page/2 to show up in the search results, then simply set this to “no-index”.
Do same for “meta keywords tag” as well.
And lastly, enable “Force noodp meta robots tag sitewide” to prevent search engines from using DMOZ descriptions in the search results for all pages.

7. Social
In the Social Accounts tab, you need to enter your social profile URL. If you already have those social accounts that I have shown in below picture, you just need to enter those URL below. It informs Search Engines to know which social profiles are associated with this site.
Yoast SEO provides more Social settings under the Social accounts tab i.e Facebook, Twitter, Pinterest, and Google+. We will show you how to setup Yoast SEO Social Accounts.

1. Facebook Settings
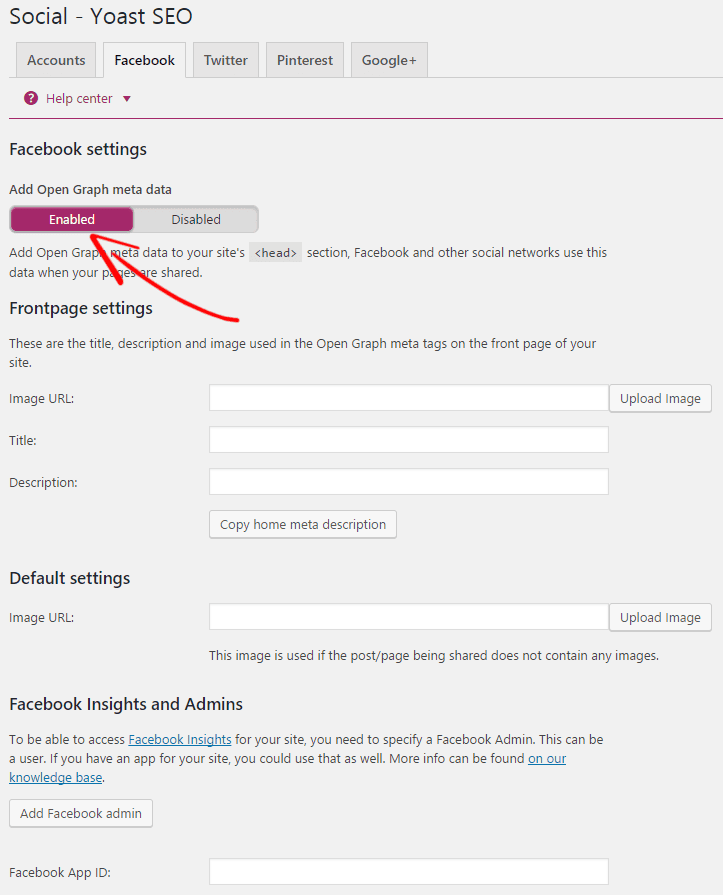
Enable “Open Graph meta data” from Facebook settings. When you share your pages on Social networks, it adds the Open Graph meta data to your site’s head section.
From the “Frontpage settings”, you can add image, title, and description or you can copy home meta description.
If you add a default image in “Default settings”, then this image will be used if your post/page is being shared without any image. You need to add Facebook App id to use Facebook Insights.
2. Twitter Settings
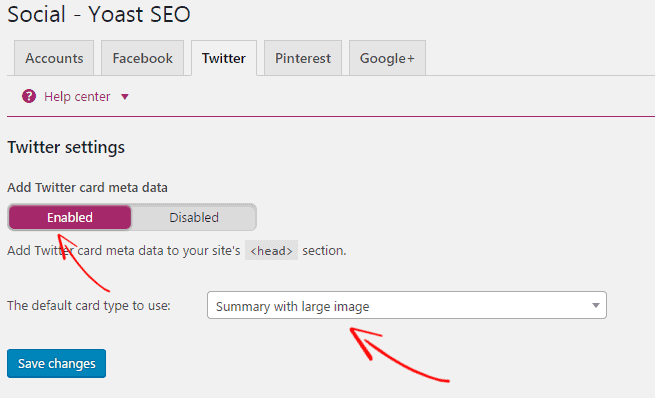
Enable “Add Twitter card meta data” and set default card type: Summary with large image. This will highlight your post/page’s summary with large image.
3. Pinterest Settings
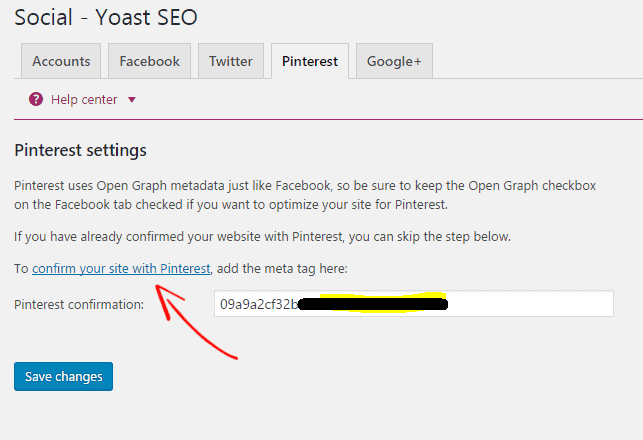
First, you need to confirm your site with Pinterest. To do this, click on the link that I highlighted below and you will be redirected to the Pinterest site. Then simply copy the meta tag and paste it on confirmation box. Don’t forget to click on Save changes.
4. Google+ Settings
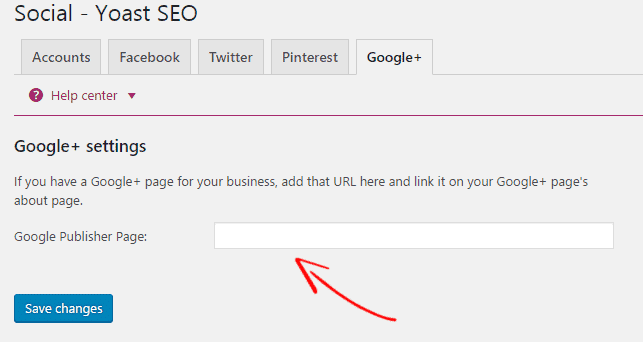
Google+ setting is same as Pinterest. Just add your Google+ profile URL and click on save changes.
8. XML Sitemaps
Yoast SEO allows you to create XML Sitemaps that helps your site to get indexed by Search Engines quickly. Although, there are many online Sitemap Generator Tools available, but Yoast SEO made it simple and you can create with just one click.
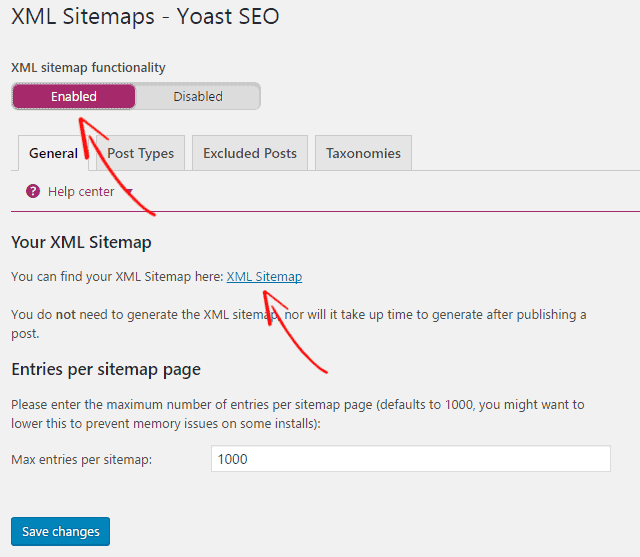
First, you need to enable XML sitemap functionality from Yoast SEO Settings and click on “XML Sitemap” link to get your Sitemap link. Then you need to submit XML Sitemap to Google Webmaster Tools.
1. Post Types
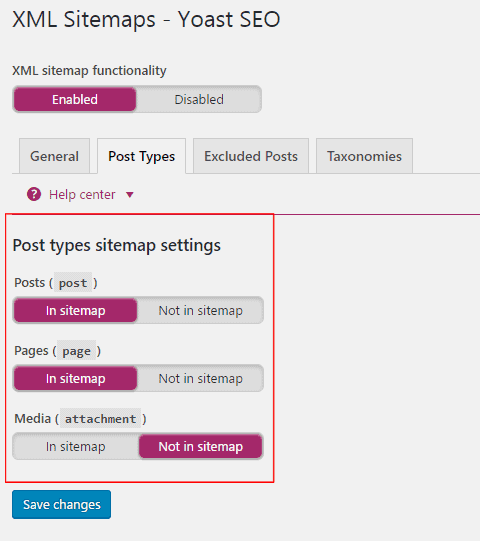
In the post types tab of Sitemap settings, enable Posts and Pages in Sitemap. That will be added to your sitemap as well. If you want Media in the sitemap, then enable it.
2. Excluded Posts
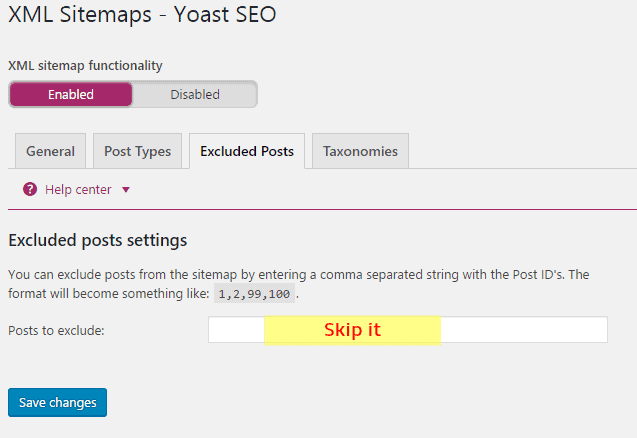
You can exclude posts from the Sitemap by entering “comma”. But this is not recommended, keep it default.
3. Taxonomies
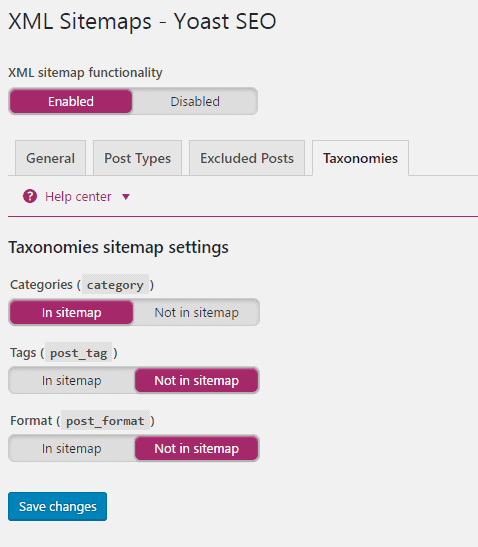
Taxonomy is a grouping mechanism for posts. It is used to as a way to group posts and custom post types together. I only use “Categories” taxonomies, rest are not necessary.
9. Advanced
1. Breadcrumbs
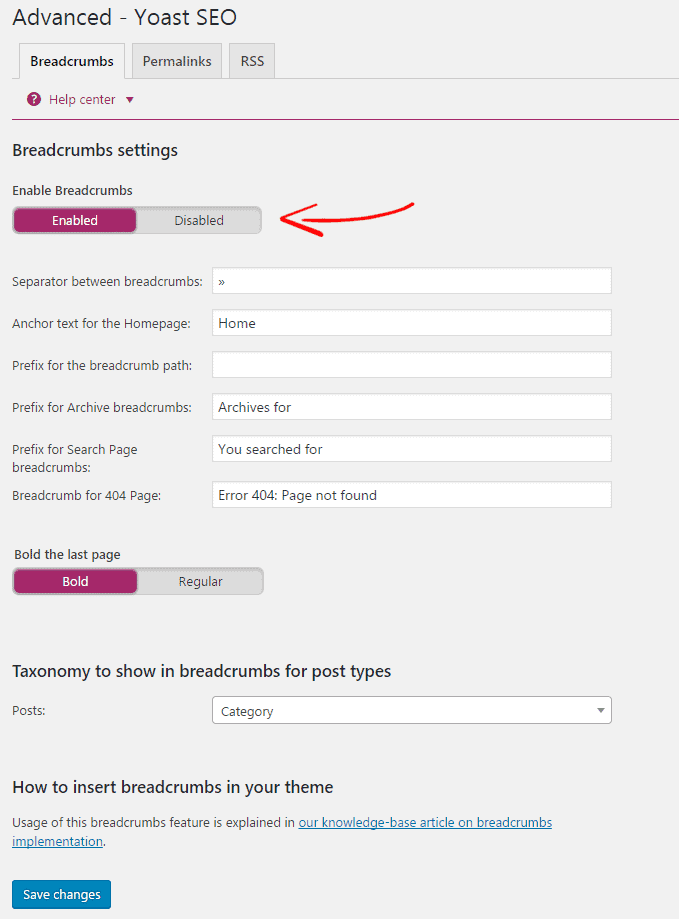
Breadcrumbs are the navigation path that indicates a page’s position in the site. This also helps Webmaster Tools o understand your site structure. If you enable breadcrumbs, your page/post path will be shown in Search Consoles like this:

But, if you disable Breadcrumbs, your page/post path will be shown in Search Consoles like this and it

You can either enable or disable Breadcrumbs.
2. Permalinks
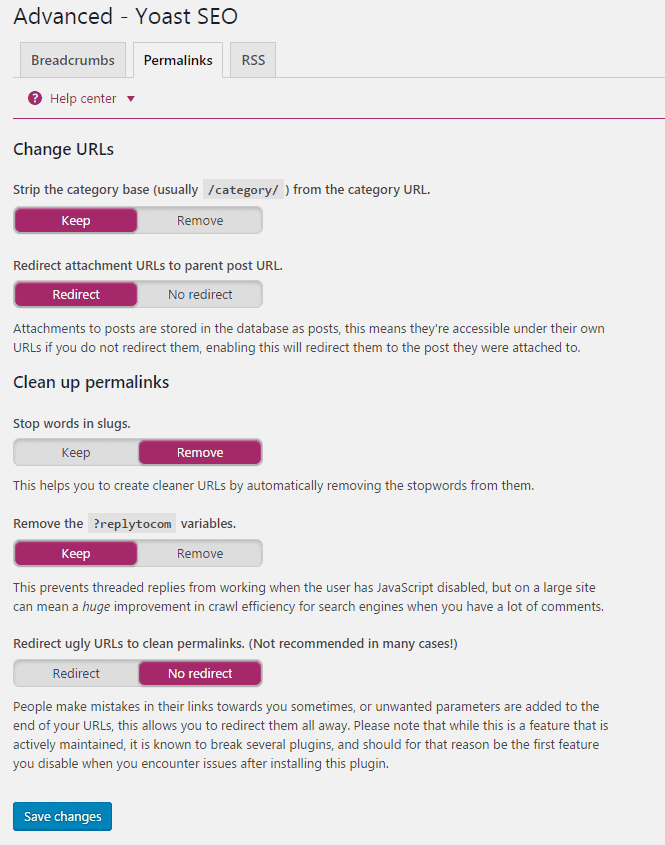
This is the Permalinks setting I am using on my site. There are few settings that you need to configure them carefully.
By keeping the “Category URL”, it adds a category base in each category URL. If you redirect attachment URLs to parent post URL, then it will redirect attachments to the original post.
Next option is to remove “stop words in slugs”. This helps to create cleaner URLs by automatically removing the stop words from them. It also helps to create smaller URLs. So set it “Remove”.
The next option is to removing the ?replytocom variables. It prevents from replytocom parameter.
3. RSS
This will automatically add content to your RSS feed. You can rearrange them by the given variables. 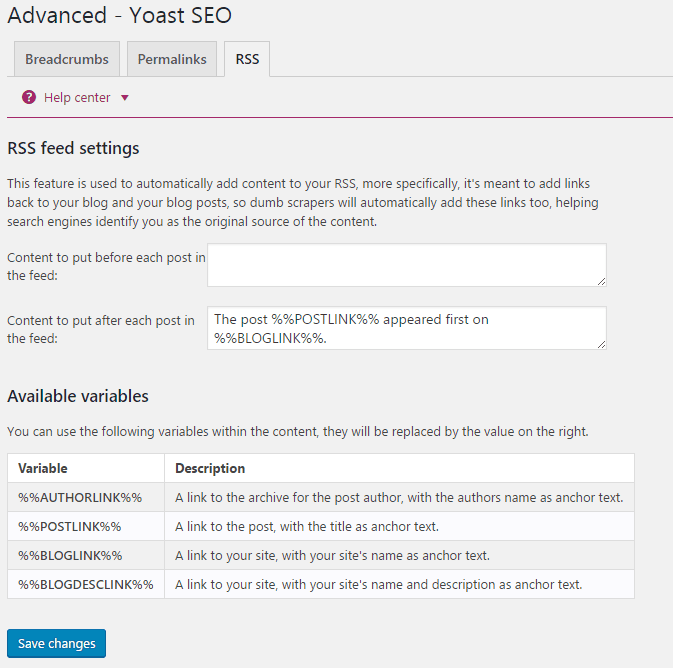
10. Tools
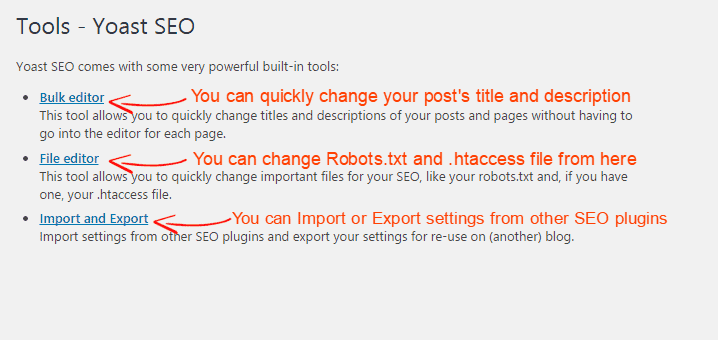
Yoast SEO comes with import/export feature that allows you to import settings from other SEO plugins and export as well. Besides, this tools allows you to quickly change your post’s title and description without going into the editor for each page.
The “File editor” tool allows you to edit your robots.txt and .htaccess file from here. But before changing any of this file, take a backup of those files.
11. Search Console
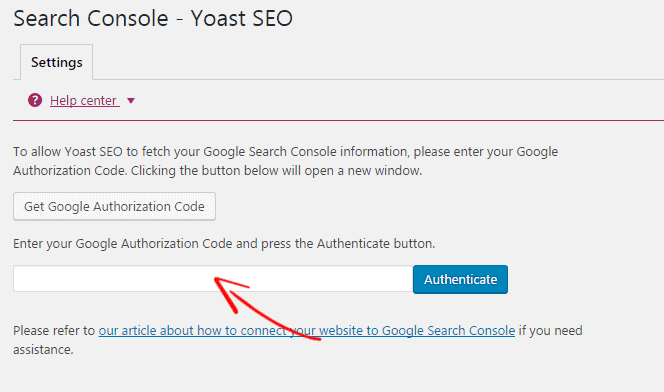
If you already submitted blog sitemap to Google Search Console, then you fetch your Google Search Console information. You just need to integrate Google Search Console with Yoast SEO and you will be provided an authorization code. Now simply add the code here and click on authenticate.
In this post, I shared how to configure and setup Yoast SEO plugin for WordPress. If this post helped you to setup Yoast WordPress SEO Plugin, then please share this article. If you have any suggestion, please let us know by leaving a comment. You can also find us on Facebook, Twitter, Google+.
*This post may have affiliate links, which means I may receive a small fee if you choose to purchase through my links (at no extra cost to you). This helps us to keep WPMyWeb up and running and up-to-date. Thank you if you use our links, we really appreciate it! Learn more.

