How to Submit Your Blog Sitemap to Google Webmaster Tools
If you recently started a blog or any other website, then you must be thinking how to make visible your site to Search Engines such as: Google, Bing, and Yahoo etc, right? There is no asset if your website is not visible to Big Search Engines like Google, Bing, Yahoo etc. As most of the traffic comes from Search Engines. Your blog or website will be helpful when users can find your website on search results. So here comes Google Webmaster Tools.
Do I need to pay $$$ to Google Webmaster Tools or any other third parties to make visible my site?
No, Google Serch Console(also known as Google Webmaster Tools) is a free service. It helps you to crawl your entire site and highlight your content on search queries.
So you need to submit your blog Sitemap to Google Webmaster Tools. In this tutorial, I am going to share How to Submit Your Blog Sitemap to Google Webmaster Tools (Step by Step Guide).
What is a Sitemap
A Sitemap is either an XML or HTML contained a file that contains all of your website links. It can be a post, page or even attachment links. You can manually submit your blog posts to Search Console, but it’s time-consuming work. So by creating a sitemap of your website makes it easier for you. Once you submit your sitemap to Google Search Console, Google web crawlers gather information about your website.
There are some online tools, with which you can generate sitemap for your website. I use Yoast SEO plugin for generating my sitemap because it automatically updates my sitemap and submits new posts to Google Search Console. This way my site stays always updated.
Pro Tip: One more thing, you can add sitemap link as “Sitemap” at the front of the page for quick indexing.
Submit Your Site Sitemap to Google Webmaster Tools
Step 1,
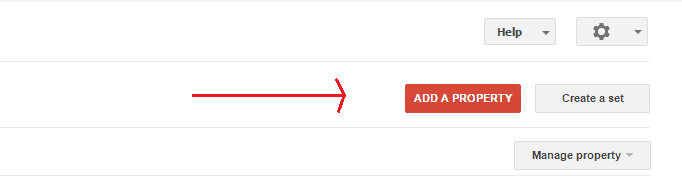
Add Site to Google Webmaster Tools: First, you need to log in with your Gmail account. Then go to Google Webmaster Tools or simply click here. Then you will get the option “Add a Property”. Now simply click on “Add a Property”.
In property field, add your website URL.
Step 2,
Verify the Ownership: After adding your site, you need to verify your ownership of your domain. There are several ways you can verify your ownership. Google recommends verifying using domain name provider. It is the easiest way to do and takes less than one minute to verify. You can see a lot of hosting provider listed there.
Recommended, In this step, you need to select your domain name provider and then log into your account. Google will automatically verify your ownership.
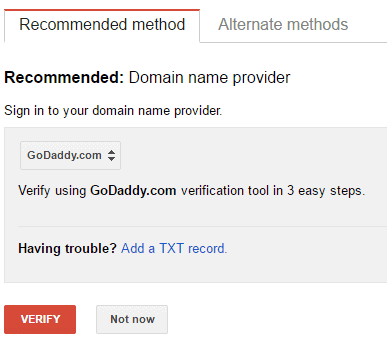
Alternate Method, But if you are not using domain name provider that is listed in Recommended Domain name provider, then you need to follow the alternate method. But do not panic, if your domain name provider isn’t listed above. I also did alternate method as I am using one of the best hosting provider, SiteGround.
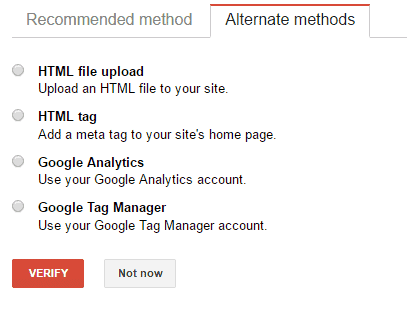
For the alternate method, I always recommend doing the HTML file upload method. It’s the easiest method and you just need to download a file from Google Webmaster Tools and upload it to your WordPress root directory.
But if you are comfortable with coding, then you can use HTML tag. After getting the unique HTML tag, you need to add the code in your header.php file. Must take a backup of this file before editing anything.
When you did any of this method, you need to click on “Verify” button.
Step 3,
Add Sitemap to Google Search Console: Now you are verified your property. So the next step is to add the sitemap to Google Webmaster Tools.
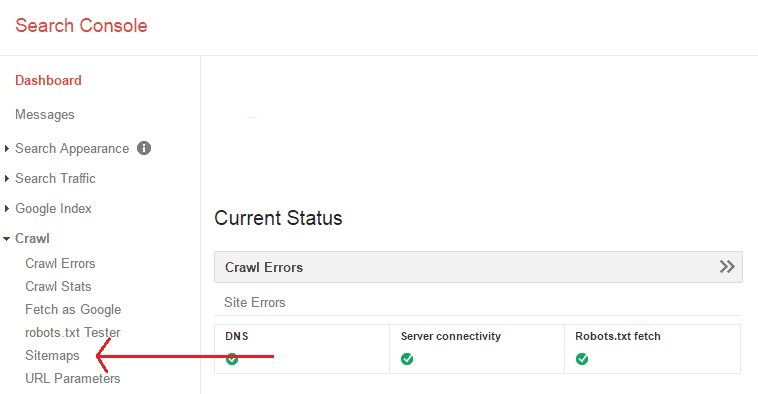 After verifying your property, go to your Google Search Console Dashboard. Now Click on Crawl>Sitemaps. Then click on Add/Test Sitemap button.
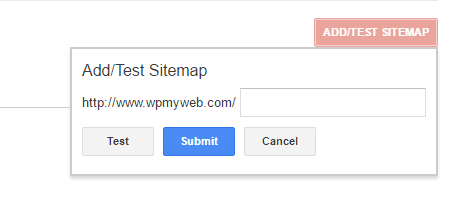
Your Sitemap will look like this yourdomain.com/sitemap_index.xml. Like my site Sitemap looks like https://www.wpmyweb.com/sitemap_index.xml. So you just need to add “sitemap_index.xml” in the blank box and hit on submit button. Now refresh this page to take effect and Done!
Now you have successfully submitted your blog Sitemap to Google Webmaster Tools (Google Search Console).
See also, How to fix error 404, Page not found problems.
*This post may have affiliate links, which means I may receive a small fee if you choose to purchase through my links (at no extra cost to you). This helps us to keep WPMyWeb up and running and up-to-date. Thank you if you use our links, we really appreciate it! Learn more.