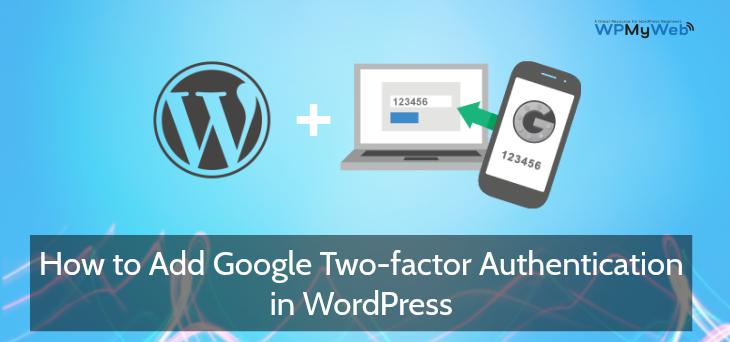
How to Add Google Two Factor Authentication in WordPress
There are many ways hackers can exploit your WordPress site. One of the most common hacking methods is brute force attack. A brute force attack is a hacking method where hackers use an automated tool to generate a large number of data such as a user password.
If you are using a very weak password or don’t change your WordPress login password frequently, then it will be very easy for hackers to guess your password and they can access your site.
But, don’t panic. You can harden your WordPress login page by adding Google two-factor authentication.
In this tutorial, I will discuss what is two-factor authentication and how to add Google two-factor authentication in WordPress.
Why Add Google Two factor Authentication?
Two-factor authentication (2FA), also known as two-step verification is a security mechanism that requires two methods to verify your identity.
For example, we usually use username and password for logging in to our site. By adding two-factor authentication will require you an extra verification process like a smartphone app to approve the authentication requests.
So, if someone knows your password and tries to access your website, they need your phone to get the verification code in order to complete the verification process.
If you don’t change your password frequently or using a simple password, then the two-factor authentication will provide you an extra layer of security to your login process and prevent further brute force attacks.
How to Add Google Authenticator in WordPress
First, install and activate Google Authenticator WordPress plugin by Henrik Schack.
Once activated, go to Users> User Profile and there you can find Google Authenticator Settings.
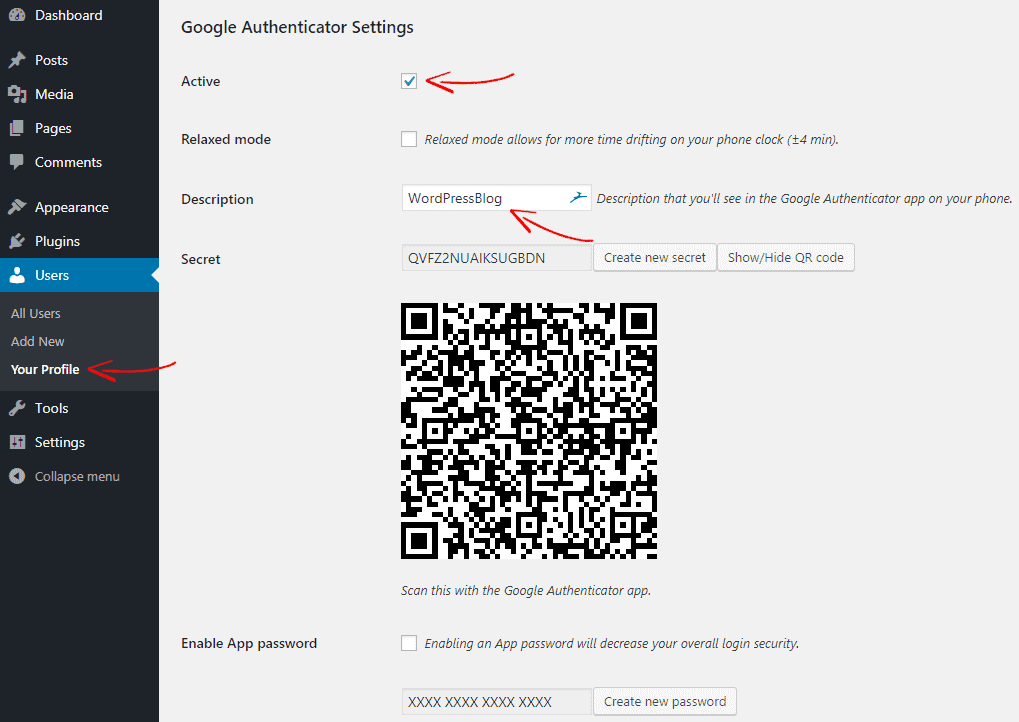
- Active: Checking Active option will enable two-factor authenticator in your WordPress site. Then you will require to enter your Google Authenticator code to login to your site.
- Relaxed Mode: By default, the authenticator app code automatically changes in every minute. If your typing speed is slow and wants to extend the code expiry time, then enable Relaxed mode. I don’t recommend to enable this option as this will lower your overall login security.
- Description: Description contains your website name that you will see in the Google Authenticator app on your phone.
- Secret: The Secret option will generate a unique QR code. You can add your WordPress site in the Google Authentication app with the help of secret code or QR code. You can also generate a new QR code by clicking on Create new secret button.
- Enable App Password: If you manage your WordPress site using Android or iPhone app or any other software that requires XML-RPC enabled, you can enable Enable App Password option from the plugin settings. But, this will reduce your overall login security. So, keep it off.
After generating the QR code, click on Update profile.
Now, click on Show/Hide QR code to see your QR code and let the page open on your computer. We will now install the Google Authenticator app on a mobile device.
From your phone, go to the app store and install the app “Google Authenticator”.
Upon installation, open the app and click on the (+) button to add a new account. It will ask you to scan a barcode or enter a provided key.
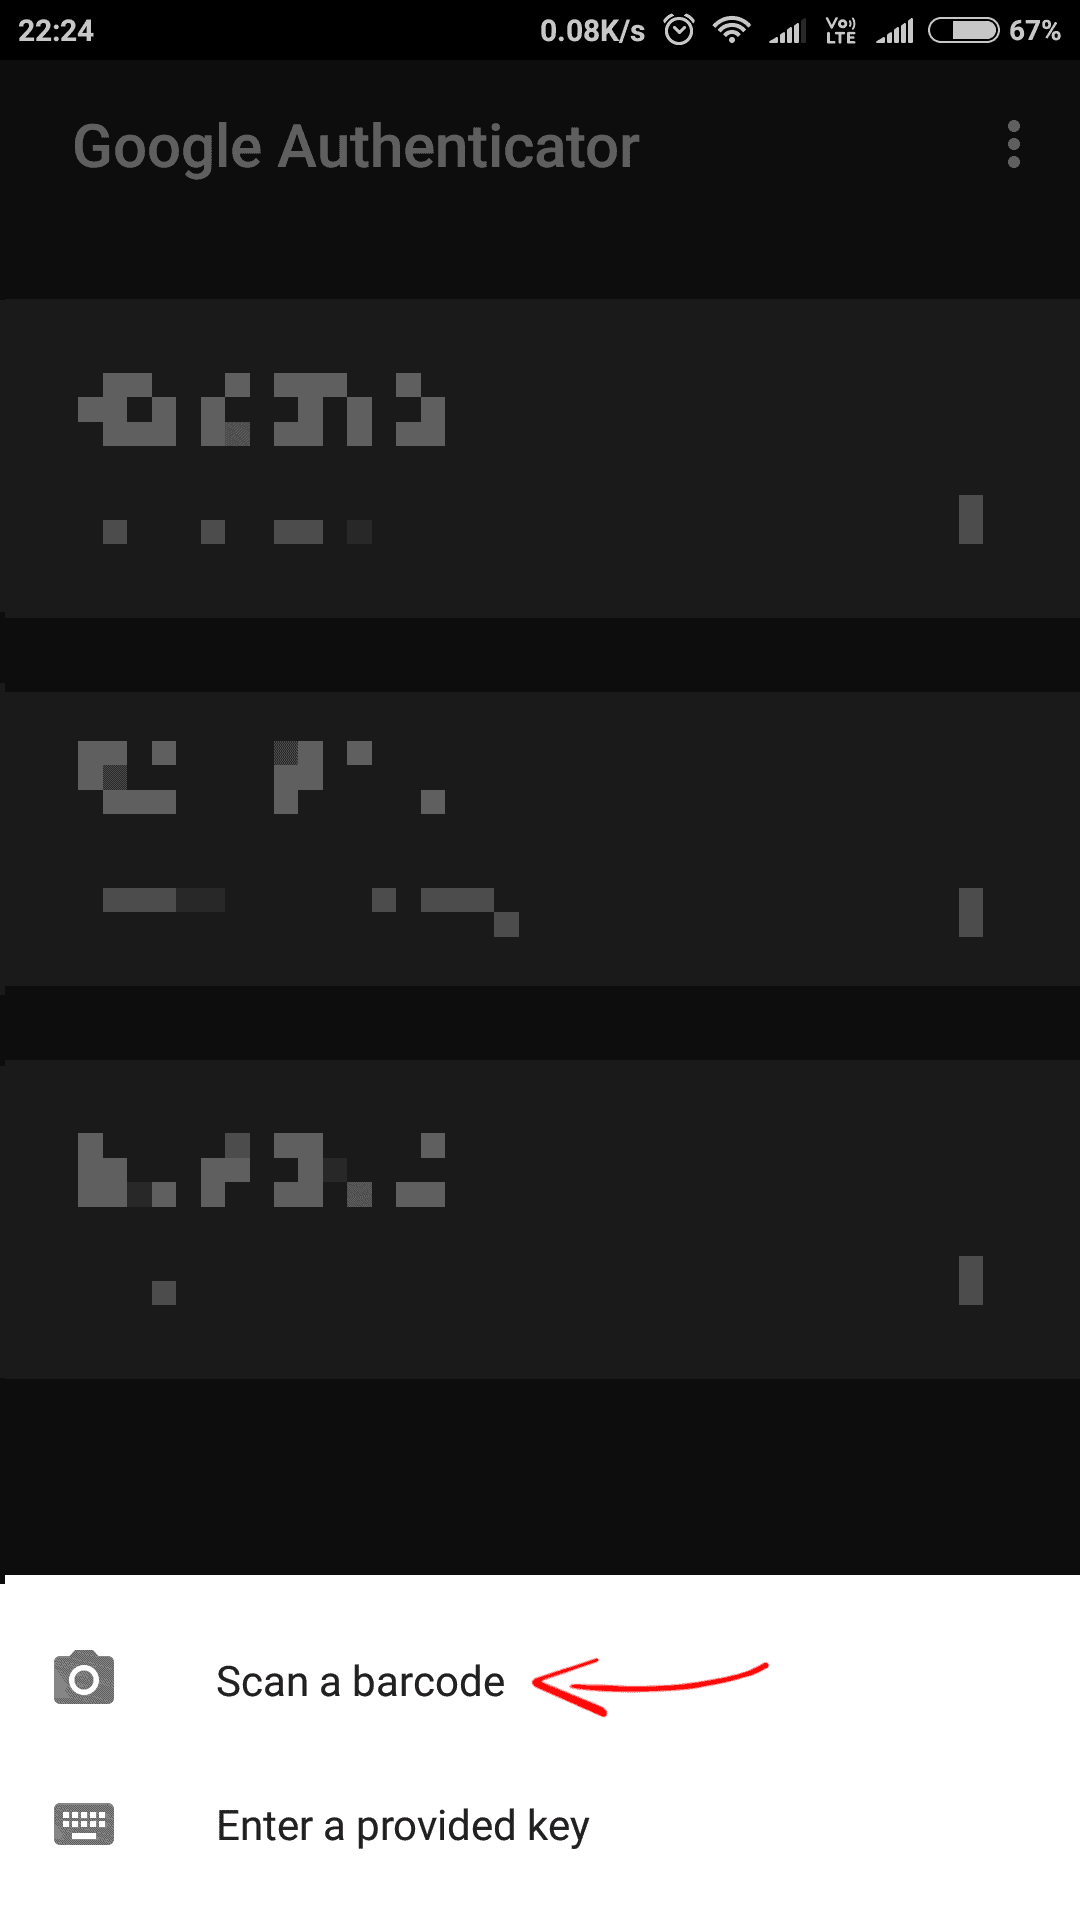
Click on “Scan a barcode” and go to your website where you left off.
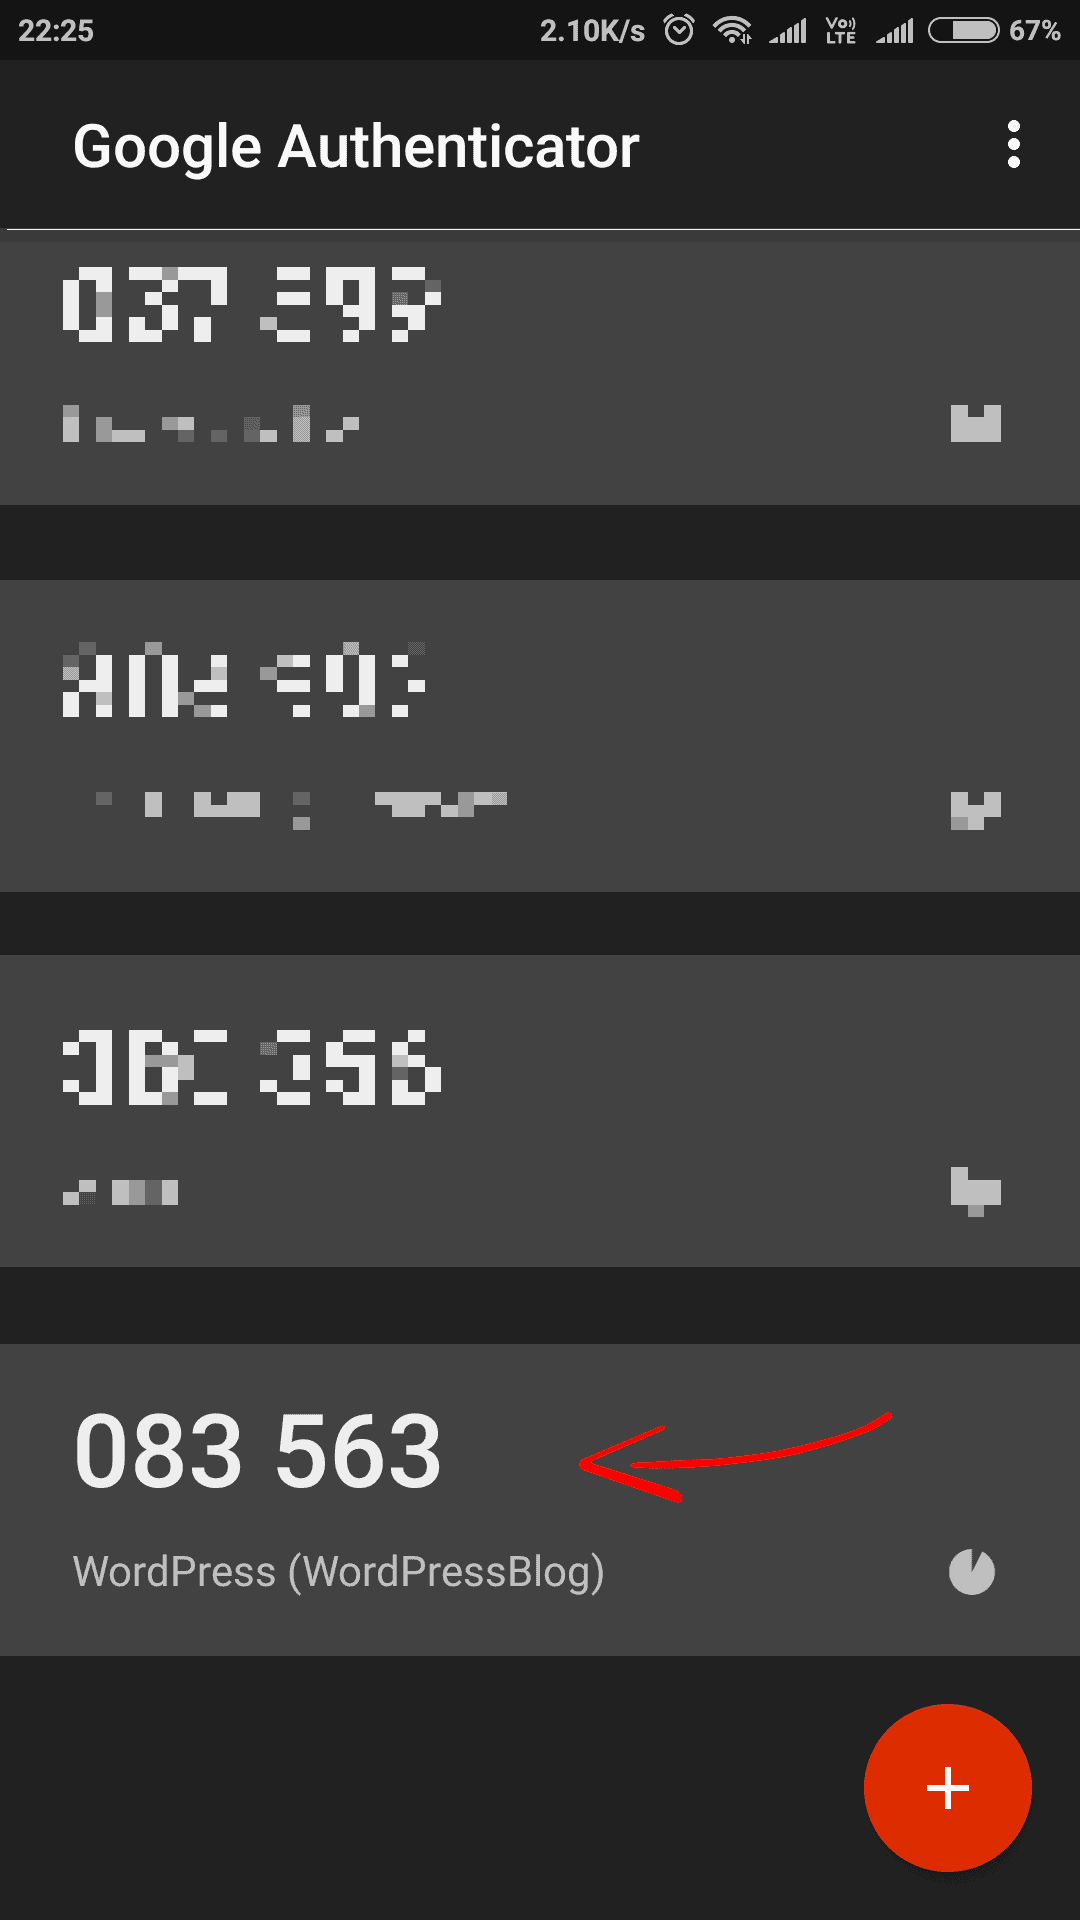
From the page “Google Authenticator Settings”, scan the QR code and your website will appear in Google Authenticator. It will show you a randomized 6-digit code which changes in every minute.
Now log out from your WordPress site and go to the login page again.
On the login page, you will see an extra field where you need to enter your Google Authenticator code from your mobile app.
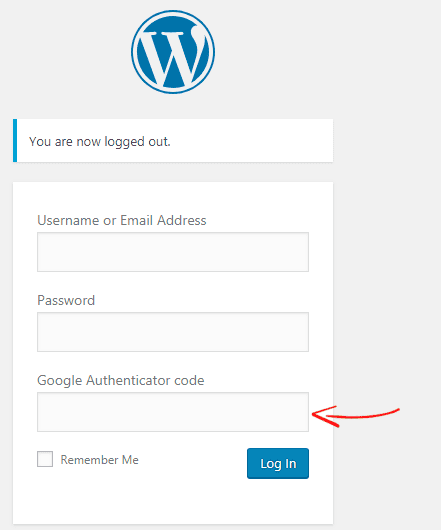
Enter your Google Authenticator code in the field and you will be able to login to your WordPress site.
That’s it. Now you have successfully added Google two-factor authentication in your WordPress site.
Note: If you are running a multi-author WordPress blog, then each user requires to generate their own secret key or QR code from their user profile and add their account to the Google Authenticator app.
If you like this tutorial, don’t forget to share with your friends.
Related articles,
- How to Protect WordPress Login Page
- How to Hide WordPress Version Number
- How to Automatically Log Out Idle Users In WordPress
*This post may have affiliate links, which means I may receive a small fee if you choose to purchase through my links (at no extra cost to you). This helps us to keep WPMyWeb up and running and up-to-date. Thank you if you use our links, we really appreciate it! Learn more.